
after 28 years of living in my parents house I finally bought them something they’ve always wanted a brand new hot
tub
all right I think this one sprung a leak so maybe I’ll just build them one instead in this video I’m going way
outside my comfort zone and tearing up my parents backyard for almost three months to build this one of a kind
Mountain inspired and Wood-Fired Natural Stone Hot Spring
so this is a massive build I’m taking on that’s going to take me months and it’s all starting with this blank area of
grass around these evergreen trees in my parents backyard so step number one was to get the stone
here so that I could kind of visualize before I started digging just a big hole in the backyard
I decided to go with some weathered Limestone to give it that really natural mountainy look and feel so I had that
delivered from Select Stone in Burlington Ontario and a full truckload of this stone cost about 3 500 bucks
[Music] start digging up the dirt and changing the view of this landscape it’s been
untouched since I was a baby
so before I started digging up the actual body of the hot tub I dug a five foot deep trench from the house back to
about the end of this run of evergreen trees this is going to run the main electrical through it back to a sub panel in the
backyard as well as a water line for some future builds that I can’t tell you though this trench is then also going to
backfeed another electrical line up to another post that’s up closer to where the hot tub is with two 20 amp GFCI
outlets on it this part I had done by some real licensed electricians because it’s far
too permanent for me to have the internet tell me everything I did wrong and not be able to fix it because it’s five feet underground
foreign inspected I filled in the trench and started leveling out the area where I’m
actually going to build this hot spring [Music]
[Music]
so over the next few days I took a good while and measured out all the stones and just got a basic idea of where I
wanted these to be fit into the final design in my head and once I was somewhat confident I knew
anything of what I was doing it was time to break ground
foreign
foreign
[Music] the rough dimensions for the hole dug I just used a shovel to go around and do a
little more of the fine detail work I have this step about halfway down the hole that’s going to Aid in propping up
the stones a little bit higher and then I also shaped up this mound of
dirt that’s going to eventually be a waterfall all right
then I just used a long two by four in a level to make sure the ground around this hole is all roughly level so
that’ll save me a lot of work in the long run
then the next day I just touched up the hole a little bit more to get it ready for some underlayment and pond liner I
also removed any protruding roots or sticks or stones or anything sharp that could possibly poke through the liner
[Music] then we move some of this underlayment into place this is just a maybe quarter
inch thick piece of felt that goes underneath our pond liner and just gives us even more of a buffer zone from
anything sharp poking through the liner in the long run so this is being built really similarly to the way you would
build a pond so to do that I have this 45 mil EPDM pond liner it’s a really
thick stretchy rubber liner that should resist punctures really well it’s also quite expensive it was about two
thousand dollars for this liner
[Music] rocks into place so I have this two inch tow strap that
has a ten thousand pound braking capacity and most of the Rocks we’re moving here are about 500 to 2000 pounds
so this should be just fine to lift these into place so I’d sling up the Rock and kind of a
figure eight pattern and then as the excavator would lift up the rock the tension would actually tighten up the sling and not allow the rock to fall
through this sling was connected onto the excavator using a single point in
balance in the rock that way I could spin the rock around and get the exact face I want exposed as we were placing
it into the tub dog after we had some base rocks placed I
would take some smaller Boulders and plug up the holes and then level off with some pea gravel so that we could place some more rocks on top
the next few days were just spent placing rocks and at this point in the build I was getting pretty nervous and
in over my head I would come out here at night and just look at the hole and just think of how much work there still is
yet to be done and how many things could go wrong along the way one little puncture in the liner would make the
whole thing useless or my bigger concern was having a looser misplaced rock that settles over time and becomes unstable
and ultimately a threat to anybody inside at this point every part of me wanted to
just throw in the towel and start another build and fill in this hole but this far along the only way out is
through and I just have to make it as safe as I possibly can
now before I place some of the final Stones I have to run the plumbing pipes for the pump intakes and the return Jets
so I have this inch and a half flexible PVC pipe in that’s usually used in hot tubs or Spas but I’m going to use this
in my hot tub or Spa I guess usually used in more traditional above ground
hot tubs and Spas built by people who actually know what they’re doing so I dug in some crevices behind the liner
and then I placed in two pipes going from the bottom outside the tub that’ll Connect into the pumps and then one pipe
going around the whole circumference of the tub that’s going to have our return jets in it I just duct tape some of the
piping into place along the liner for now until we have the walls actually built that’ll hold it in place rigidly
[Music]
[Music] and with the rough plumbing laid out we can go ahead and place those last few stones and finish up the waterfall area
[Music]
it’s not going anywhere with this excavator rented for a full
week to place these stones and I’d say on average it took at least an hour to place every individual Boulder
generally the area underneath the tarp would have to be dug up with a shovel just to fit the Contour of the Boulder
and then we’d have to place it a few times to get it to sit right and make me feel confident that it’s never going to
go anywhere [Music] but after a week of doing that the
majority of the stones are placed and I can move on to some concrete work [Music]
so I have a bunch of bags of this Quikrete 5000 and I’m just mixing these up by hand
foreign and then I’m pouring a pad at the very
bottom level of the tub [Music]
I think I used about 10 bags in this and had a pad about three or four inches thick in the end
and this is basically just going to be the floor and everything else for the walls and seats are going to be built up from here
[Music] by the way if you think it’s crazy that I’m using a shovel around this fragile
liner here’s a clip that shows just how durable this EPDM liner is
digging right through this into settled grounds still didn’t poke a hole in it rather it jammed down into the ground
with the shovel that doesn’t mean you can’t poke a hole in it but it’s pretty damn durable and if you’re doing a build like this you definitely need this kind
of liner with the concrete poured in place I just traveled it out nice and smooth and made
sure it was as level as possible [Music]
then a couple days later it’s time to start working my way up so I have these concrete patio pavers that I just had
laying around and I’m going to use this to Brick and Mortar my way up to the level of where the seats are going to be
so I mixed up some mortar [Music]
and use the travel to set a mortar bed and then add butter the end of the brick
and set it in place [Music]
since I couldn’t run a string or any kind of level over this I had to level every single brick that I laid for the
entire process of doing this [Music]
once I was done a layer or two and the mortar was still somewhat soft I would go around with my finger and just smooth
out the joints foreign
[Music]
after I got a few layers up it was time to plumb in the intake pipes for the two
pumps [Music]
so I’m just using normal PVC fittings for this and then I’m using this primer
and priming both the fitting and the pipe and then I have this PVC cement that’s
designed specifically for this flex PVC tubing and then add cement the joints together each of these pipes needs two
openings to suck up water as every pool pump does so I first cemented in a t-joint and
then a little section of pipe and then this female threaded fitting
[Music] ordered them into place hanging out about a half inch or so outside of the
brick [Music] I have four of these intakes in total
two for each pump
[Music]
[Music] the next day I took some pea gravel and
leveled this up to about two or three inches below the top of the brick level
[Applause] and then we’re gonna hand mix up a bunch
more concrete and pour this seat slab this was another probably 10 bag job but
with me and my brother mixing it’s really not that bad this concrete really probably should
have had some rebar in it but I didn’t have any around and I honestly didn’t even really think of it until the concrete was already down at which point
it was too late so I guess we’ll see how this holds up in the long run that’s another one of the costs of doing a new
thing every month you really don’t know what you’re doing a lot of the time and you think a lot of the stuff after the fact when it’s too late
[Music]
[Applause] all right and with that leveled out and set up for
a few days I started Brick Lane final walls
[Music] I also had to rig up some Plumbing Behind These Walls so this is the return
jet from the heater and this line runs all the way around the tub with six different return Jets
set them in place into the walls pretty much the exact same way as I did the intakes earlier [Music]
[Music] thank you
[Music]
[Music]
now we loved hand Mixing concrete so much that we decided to mix up another 25 bags to fill in Behind the Walls I
decided to do this in concrete instead of the pea gravel like I did in the lower level just to give the walls a
little bit of extra strength and really case in the piping but the gravel I used Behind the Walls
at the bottom is actually going to help filter the whole hot tub because enough of the water coming down from the waterfall isn’t going to make it into
the main body water it’s actually going to trickle down in behind the rocks and end up behind the main walls of the hot
tub and it will then filter through all that pea gravel and sand and exit through
some weep holes that I drilled into the wall and enter in with the main water that’s the theory anyway but it was
mainly just because I didn’t think of pouring concrete that early on [Music]
[Applause] next I have some mortar and some smaller rocks and I’m trying to make a couple
steps here to get in and out of the hot tub [Music] so I used the small rocks and the mortar
to make a ring around on top of the big rocks and then I used some sand concrete mix
to level off a flat step [Music]
well I had the mortar out I also moored up a couple places around the Rocks either to hold some gravel in place or
in this case to cover up the underlay that was still poking out through the concrete
[Music]
now it’s time to add the tile so I have this Mega light tile adhesive
and I just got this because it said it’s safe for outdoors and for submerged or swimming pool use
so I mixed it up according to its directions and then I have this Riverstone Pebble tile that I’m going to
use to cover the entire interior body at a hot spring so using a quarter inch square Notch
trowel I spread out a thin coat of the adhesive over the brick
[Music]
and then I use the notch side to scrape off any excess and ensure the right amount of adhesive is left on the wall
then where I could I’d take one of these four one square foot mesh tiles and press it into place
but for the most part I just took the Pebbles right off of the mesh back in and put each Pebble in individually
[Music]
foreign [Music]
[Music] I worked away at this for the next few
days starting off with all the walls and then the seats and finally the floor
[Music] it took about three days in total just
to place the tile but in the end I was pretty excited because that is looking pretty good
yeah [Music] now I’m going to cap off the top of
these walls with some paver stone so I filled it up flush to the top of the wall with some more pea gravel
[Music] and then I set these pavers roughly in
place for a whole run so that I could cut the ends to size
and to do that I just use this cheap concrete saw that I picked up a Canadian Tire for a couple hundred bucks
and just cut the paver to the basic shape that I need [Music]
[Applause] [Music]
once I was confident with the rough fit I mixed up some mortar
[Music] placed a good thick mortar bed and then
mortared these pavers into place just like the bricks and the walls I
leveled every single Stone as I placed it relative to the ones beside it as well as relative to the ones that across
the pool [Music]
foreign [Music]
and now that’s starting to look a lot more finished so let’s move on to grouting the tile
I have the silver colored grow but before I mix that up I’m going to cover up all these intakes and jets with some
duct tape as well as duct taping around the stones to basically act like some painters tape
for this grout then I mixed the grout up with some water according to the manufacturer’s directions
[Music]
[Applause] I used a sponge float to apply the grout working it into every little crease
between every single of these Stone tiles is a time consuming task not only
applying it but then cleaning it up afterwards
[Music]
once I had a section all filled up with some grout I took a tile sponge and started working away all the excess
[Music]
you have to clean this sponge regularly so I’d keep two buckets of water one to rinse out the majority of the grout and
then one that holds a lot cleaner water to basically get a two-stage wash before it goes back onto the tiles
I also had to change this water out pretty regularly because I’m taking off quite a bit of grout here with the sponge
[Applause] so basically I just have to go over and over with the sponge making sure the
water is as clean as possible and after doing that oh I don’t know like maybe 15 times the stones started to become
pretty clear [Music]
[Applause] and the actual interior body of this hot spring is now pretty much done
[Music]
now we had to rent an excavator for one last day just to move our final stones into place
[Music]
foreign and now I’m ready to start cutting back and hiding the liner
[Music] so basically I’d first cut off a bunch of the extra liner
and then I’d hold it up to the edge of the wall and fold the excess over I’m leaving a little extra on here just
in case it needs any modifications in the future then I’d temporarily tape that up against the wall and use some pea gravel
to push it up into place since I tucked it up right against the wall even if we get heavy rain most of
the runoff should go out and around the liner rather than into the pool which should keep it a lot cleaner
and up around some of the Rocks I could get a little more creative hide in the liner using some smaller Boulders and
pea gravel to just hide it right where it is [Music]
with that done I can move on to some of the landscaping around the hot spring
[Music]
[Music]
foreign [Applause] [Music]
I got a load of topsoil delivered and I spread that out with my tractor and my shovel to make a couple flower beds
around the hot spring and as an underbed for some fresh sod [Music]
[Applause] [Music] [Applause]
[Music]
a now I’m going to build up this waterfall
area so I’m placing in a few smaller rocks that the water is going to spill around and then I’m using this waterfall
expanding foam to seal around all the gaps and cracks the idea of this is
basically to get rid of anywhere else the water could flow except for over top of the Rocks you want it to spill over
[Music] [Applause] [Music] so I have two main spill stones that I
really had to foam up a lot especially underneath because water will find its way through no matter what crack there
is I’d use some smaller rocks and pea gravel to hide the look of the foam as
it was still wet and it would just grab right onto them
and after it set for an hour to I’d cut away anything that bulged out after that
I just brought in some more pea gravel to level it up with the rocks and use some more small boulders to make it look
a little more natural [Music]
and we’ll see how that looks once we turn on the pumps
and pumps the next thing I’m going to build is this little outdoor pump hose to hose our two pumps and filters
so I’m just building up a frame for the floor out of some pressure treated two by fours [Music]
and then I’m using some cedar deck board to deck over top of this
foreign [Music]
then I’m framing up my four walls using some more pressure treated two by fours
[Music] and the one wall is taller than the rest
because I’m gonna have a lean to roof Style [Music]
then I cased around this whole structure using some cedar fence boards
also a good tip to not split fence boards when you drill into them is start off with your impact in Reverse just for
a second or two and then click it into forward and drive the screw in this just pre-drills the hole a little bit and
prevents it from splitting like 98 of the time notice I also left about a half inch gap
between all these boards that’s so that there’s still airflow through here to cool down the pumps now I’m building up a removable roof for
this pump house so I just temporarily screwed these fascia boards into place and then Mark the cut lines parallel
with the building [Music]
and then I screwed the whole assembly together foreign
the roof’s about a half inch wider in all directions than the top of the structure so it just pops right on top
and can easily be removed to access the pumps then I just cut up one of these clear roof panels and screwed it into place
with some roofing screws [Music]
and then this should fit our two pumps and some other stuff inside and we’re going to move this out to the hot spring
[Music] so then I started Plumbing up all the
pipes into our pumps so I have one dedicated pump that’s just running straight to the waterfall this one
doesn’t have a filter or anything on it just the skimmer box that comes attached to the pump
now I have another pump that’s running the main circulation for the hot tub that’s going to run itself through a cartridge filter as well as then into
the heater
so with those plumbed up I primed the waterfall pump and turned it on to see if it works
[Music]
it’s going to take a few days or maybe even a few weeks of running this to wash all the dirt and sand out of that pea
gravel but it still looks sweet in the meantime and it’ll look even better when it’s Crystal Clear
I also added in this ultrasonic Mist generator up near the start of the waterfall and this is really going to
set the mood once everything’s all running now I need to figure out a way to heat the water so my original idea was to get
some stainless steel sheet metal and weld up my own wood stove heater so I bought some steel and just tried to
test my welding ability since I’ve never welded stainless steel or sheet metal so I just wanted to weld up a cube with
a water inlet and then pressurize it and see how waterproof I can weld
good [Applause] yes
that’s waterproof [Music]
so I think it’s pretty obvious buying a heater was the only solution to this problem so I picked up this 70 000 BTU
wood hot tub heater from a company called Northern Lights hot tubs for 2200 bucks but first I need a concrete slab
to set this on so I whipped up a form quick and just poured about a three bag pour
and a couple days later the heater is good to move into place
foreign [Music]
to the last stage of this build which is just making it look pretty with some Landscaping
I picked up a few more exotic looking trees and then planted them with a mix of peat moss compost and native soil
and then I got a whole ton of plants to make this look as natural as possible and not like it was just constructed
[Music] spent like twenty two hundred dollars in plants for this which is ridiculous but
as long as I’m making money on YouTube I’m just gonna pump it into the next video
[Music]
with everything planted we moved on to mulching and once that was done it really started to look like a finished
product [Music]
thank you
now the only thing left to do is get everything cleaned up and add the finishing touches
so I pressure washed the whole body out and pressure wash all the Moss off the stones that’s going to be below water
level since the chlorine will kill that off then I filled the body up part way and run the waterfall and then pump that
dirty water out about four times the next day I added this magnetic 12
volt pool light and I hid the cable along the rock lines with some mortar it’s also only 12 volts so even if one
of these cables gets cut inside the pool it’s not going to harm anybody’s swim and then I installed some three-quarter
inch eyeball Jets on the main return Jets and these skimmer caps on the four water
intakes [Music] now I’m going to add some of these
landscaping lights so to do that I’m going to need this 120 to 12 volt transformer and some Landscaping wire so
I installed the end of the landscape wire into the Transformer
and then I ran that out around the flower beds to install a light I used these easy little clip things that came
along with the lights so basically I just clip it around the wire and then I’d screw in this middle
piece that has a needle on it that pokes inside of the wire and then the wire for the light goes
inside this top cap and you just screw it in snug it’s actually a lot easier than I thought it was and you can set up
perfectly customizable distance and light setup pretty much whatever you want
[Music] once I had all my lights installed and
working I just buried the wire about two inches under the fresh mulch [Music]
then I added these solar tiki torches and that’s it for this build let’s fill it up with some water and hope it
doesn’t leak [Music]
thank you
foreign [Applause]
[Music]
[Music] [Applause] [Music]
[Music]
foreign [Music]
by the way if you appreciate the time and detail that goes into making my videos consider picking up some of my
merch because this goes straight towards me spending more on videos and making better and better content in the future
so with the water starting at about 75 degrees when I started the fire
it takes about two hours for the water to reach 90. and about another two hours after that
to reach the high 90s or 100.
this obviously depends on a lot of variables like if the waterfall is running or not and the outside ambient
temperature but I’ve run it about five times now and it’s pretty consistent in that three to four hour range to get it
up to hot tub Temps sounds like a lot of work but after the first 10 minutes of starting the fire
you literally just throw in a log about every half hour I might put it on propane in the future
just for ease of use but wood is a pretty cool proof of concept for now
[Music]
it stays a little bit warmer without the waterfall on and it’s still pretty neat but to be honest I’d rather be in there
at 95 with all the Steam and Haze versus 100 without because it kind of makes the whole atmosphere
[Music] foreign [Music]
overall this was a really challenging build almost every step of the way that turned out to be one of the coolest
things I’ve ever built in the end it took me almost three months to build and cost about twenty thousand dollars
Canadian All In this is in my parents backyard so they’ll be able to enjoy this for years
to come along with all my nieces and nephews thanks so much for watching my video and
if you haven’t already hit the Subscribe button and see what I get building next I’m also curious since there’s probably
lots of Pool Experts watching this how should I winterize this should I drain the water out and try to keep it empty
all winter so that the water Behind the Walls doesn’t expand and break the walls or should I blow the pipes out and plug
them and let it fill up over the winter and hope for the best let me know what you think in the comments below or on my
Instagram at Drew build stuff until next time thanks for watching
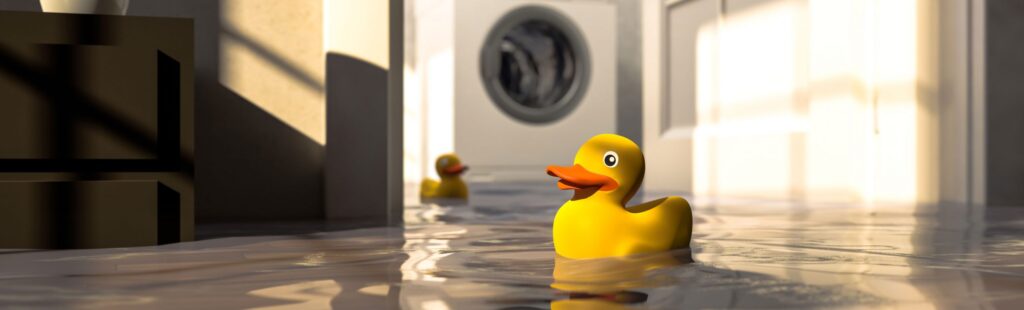
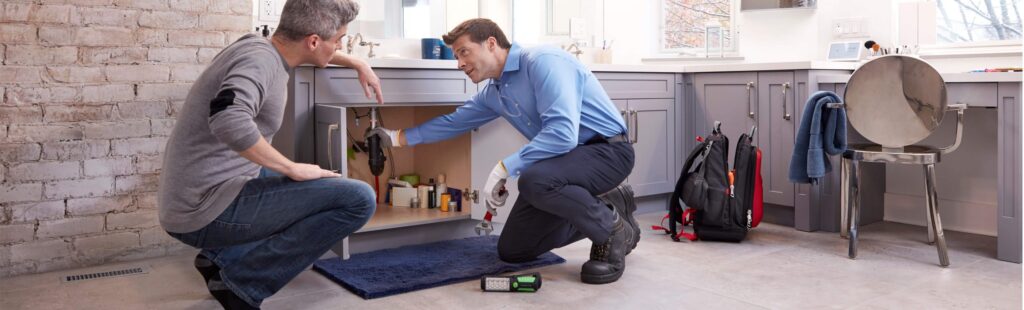
At Reliance™, we know you can never plan for a plumbing emergency, but knowing exactly what to do when one arises, is critical. We deliver expert service at competitive prices. Our certified and fully insured professionals will tell you what to expect from your repair costs and show up at your doorstep with all the tools and spare parts needed to take care of the problem the first time around.
We’re also dedicated to bringing you and your family peace of mind year round. To help avoid most unexpected repair costs, call us today and ask about our Plumbing Protection Plan to make sure you’re always covered.
So for all of your plumbing needs, Call on Reliance™.
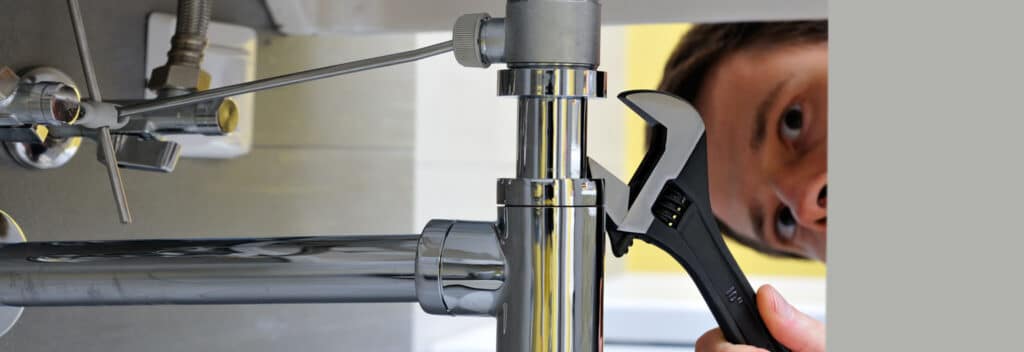
Learn More About Plumbing
Plumbing Learning Resources
Flip through our library of helpful plumbing information.
Plumbing FAQs
Questions about your home’s plumbing? Read our frequently asked questions and answers.
Common Home Plumbing Problems
Experiencing a problem with your plumbing? Read to learn if it’s a problem you can fix yourself or if you should turn to a professional.


Check out our latest Plumbing offers here!
See Latest OffersRelated Articles